Sculptable Relief
Page content
Creating a Sculptable Relief & Entering Sculpt Mode
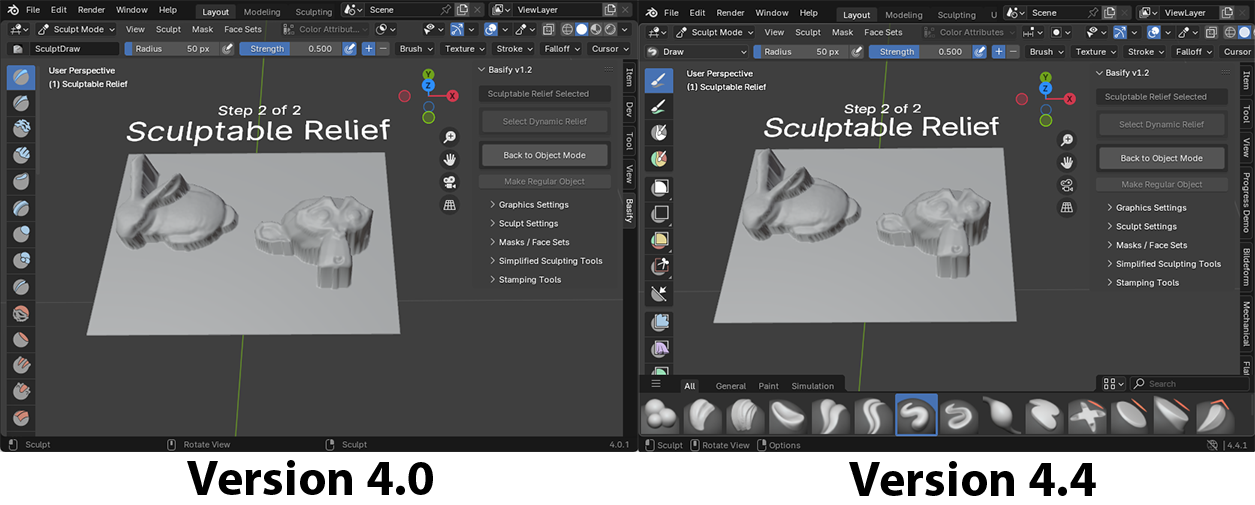
Once you are satified with the composition of relief elements, next step is to create a Sculptable Relief from the Dynamic Relief. In the main Basify menu, click Make Sculptable Relief, then click Enter Sculpt Mode.
Depending your Blender version, you will see Blender's native sculpt tools in the 3D Viewport, either on the window's left or on the bottom. If not visible, look for a small arrow that indicates a hidden panel.
Basify Settings
Reset Brush Settings: Restores Blender Sculpt tool defaults. Activating a Basify Sculpt or Stamp tool will undo this.
Reset Z < 0.0 Vertices: A destructive mesh change that re-floors any points with a Negative Z position.
Z & XY Locking: When these are enabled, brushes can only move vertices on the Z axis or XY Plane. When both settings are enabled, no movement is possible.
Boundary Rect Locking: When enabled, the vertices along the Relief Border can't be moved. Note that you can still drag non-border vertices past the border, causing overlapping polygons & invalid geometry. For certain use cases like 3D printing, this may cause you problems.
Basify's Simplified Sculpt Tools
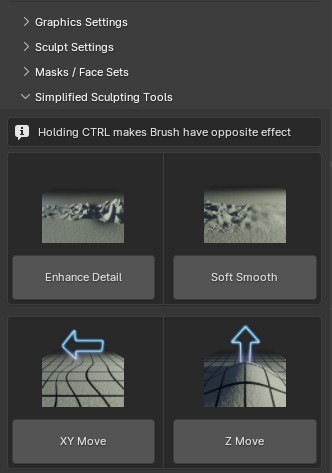
Blender is packaged with many sculpting tools, settings, and configurations. Basify simplifies these into the 4 most common actions you will likely need.
- Enhance Detail: Click & drag on the mesh to enhance the contrast of the mesh along the Z axis.
- Soft smooth: Click & drag on the mesh to smoothen high-frequency details
- XY move: With the Z-movement locked, click & drag on the mesh to pull details in a certain direction
- Z Move: With X & Y movement locked, click & drag on the mesh to raise or lower sections of it.
These 4 buttons are just a curated list of options from native Blender brushes. To restore native options, click Reset Brush Settings in the Sculpt Settings menu
Hold the CTRL key when using a brush to invert its effect. With native Blender settings & hotkeys you can also edit the strength and radius of each brush.
More info about Sculpting in Blender (Youtube)
Stamping Tools
Sculpting hair & fur is tedious, so Basify comes with a collection of Stamping brushes for easy use.
Face Sets
Face Sets isolate Sculpt effects to certain portions of a mesh. When you click to begin a stroke, the Faceset your mouse is hovering over will be the only one affected.
Basify will automatically assign FaceSet membership to the Sculpt Relief Mesh, based on the Depthmaps and Object Controllers from the Dynamic Relief.
You can activate the Faceset of a specific Controller Object, all Controllers, or disable Facesets. For the current Faceset, you can grow or shrink it from the Basify menu,
You can manually repaint the current Facesets (how to) but your changes will not persist when you update Basify's Faceset selection
More about Sculpt Mode's Face Sets (Youtube)
Tips & Tricks
Improving speed & responsiveness
On dense, high-polygon Reliefs, sculpt mode may be laggy. There are ways to improve this.
- Disable all active modifiers
- Ensure GPU support is enabled
- Use a later version of Blender. Version 4.5 is currently the fastest for Sculpt Mode.
Project Depthmap's original image onto the Relief
When you create a Depthmap from a image, keep the original image and set it as a Depthmap Alt. Image under Dynamic Relief Controllers -> Depthmaps. Then, enable Advanced Preview mode. This allows you to sculpt the relief while the original image is projected onto it. This makes makes it easier to get anatomically-accurate reliefs.
If multiple images overlap, the Depthmap Controller's Z position is what determines the order they are drawn in.
Multiple versions of the Sculpt Relief
Although Basify recommends keeping a single Dynamic & Sculpt Relief per file, you can make the Sculpt Relief a regular Blender object, then make another Sculpt Relief. Regular Blender objects don't have access to Basify's sculpt / stamp / faceset tools, but can of course use Blender's native tools.
Select the sculpt Relief, then click Graphics & Scene Settings -> Make Selected Non-Basify Object.